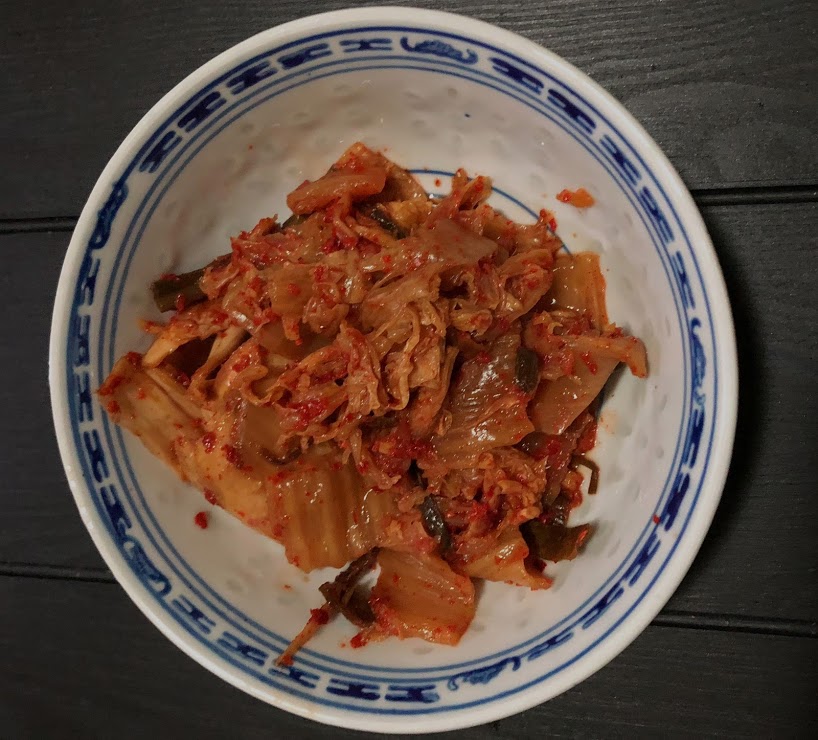
Fermented foods have been a staple in Korean cuisine for thousands of years. Kimchi is South Korea’s national dish and it is also the most poplar among all of their fermented products. Traditionally in Korea, kimchi was made during the winter by fermenting vegetables and burying it in the ground in ceramic pots called Onggi. Fermentation is an ideal way to preserve food as well as developing a lot of beneficial microorganisms.
Kimchi for the most part is a spicy fermented pickle made of various vegetables. It contains a high concentration of dietary fiber, while being low in calories. One serving also provides over 50% of the daily recommended amount of vitamin C and carotene. Most types of kimchi contain onions, garlic, ginger, and chili peppers. These vegetables also contribute to its overall nutritional value. Kimchi is rich in vitamin A, thiamine, riboflavin, calcium, iron and lactic acid bacteria.
Although traditionally it is made in ceramic or stone pots and buried to ferment, you don’t need anything special to make it at home. I was taught to make kimchi by using a 20 liter recycled dill pickle bucket but for this recipe, I will be using a 8 liter or 2 gallon stock pot.
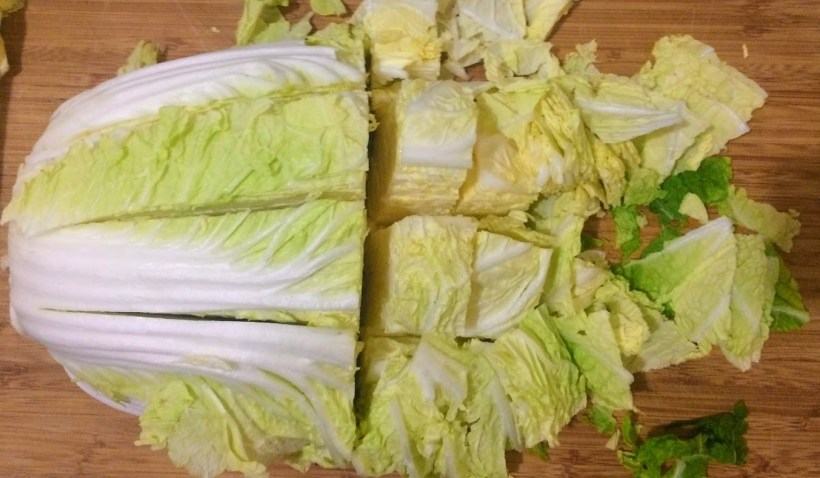
First thing we are gonna do is chop up the cabbage. For this recipe, we will be using one large head of Napa cabbage which is about 2 kg or 4 1/2 lbs.
Traditionally kimchi is made by slicing a head of cabbage lengthwise and rubbing your ingredients between the layers but we are going to simplify the process by pre-chopping our cabbage.
Slice the cabbage in half lengthwise. then make four lengthwise slices down the half head of cabbage.

Next, slice across the to make large rectangular pieces. Its best to keep the pieces fairly large because they will shrink through the fermentation process.
After you are finished chopping the cabbage, it is time to salt it. Place all the cabbage in a pot, bowl, or any vessel large enough to store all the cabbage. Now mix in 1/3 cup of Kosher salt and massage the salt onto the cabbage to evenly coat it. Then simply cover and let it sit at room temperature for 6-8 hours. Over time the salt will pull the water out and wilt the cabbage.

While that is happening you can ready the other ingredients.

For this you will need:
- 2 bunches of green onion
- 1/4 cup raw cane sugar
- 1 large piece of ginger about 3 inches or 7-8 cm
- 8-10 large cloves of garlic
- 1/3 cup of Gochugaru (Korean Chili flakes)
- 1/4 cup fish sauce
- 1/3 cup soy sauce
- 1 tbsp salted shrimp paste (Can be found at Asian grocery stores)
Start by peeling your ginger. I find using a spoon is easiest.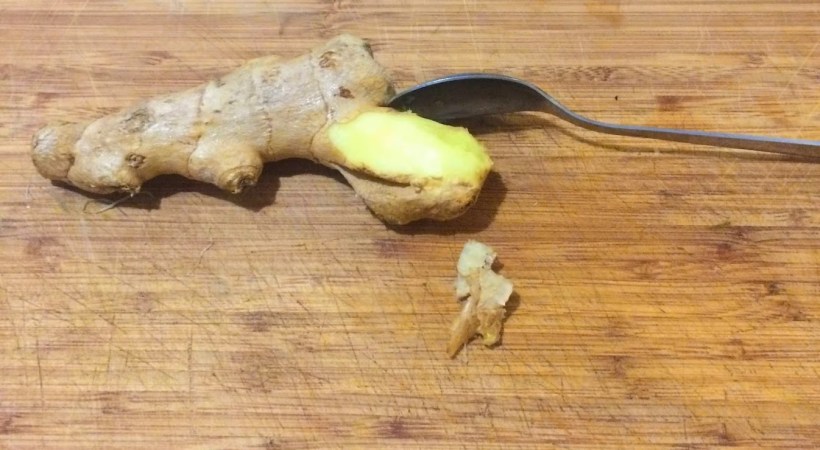
Slice the ginger by first cutting into 1 inch pieces then slicing each piece into strips.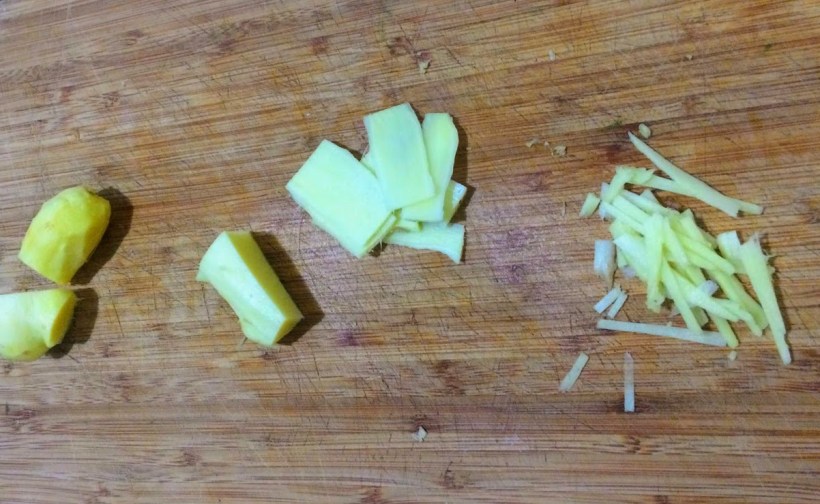
Place the strips in a small mixing bowl and move on to the garlic. Peel your garlic and grate it into your mixing bowl with the ginger.
Next slice the green onion into 1 inch slices. 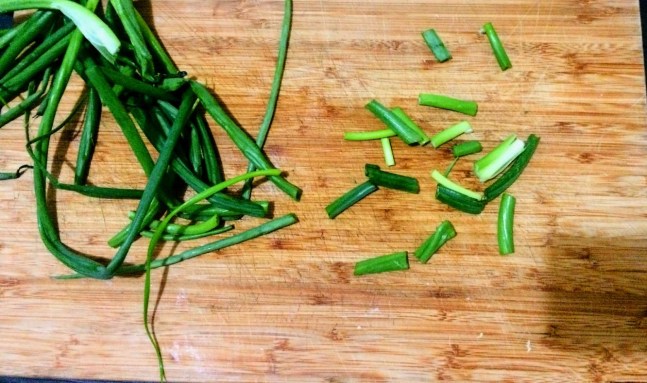
Measure out the rest of the ingredients in a the same mixing bowl and set aside.
After 6-8 hours, your cabbage will be ready. Simply remove all the cabbage from the pot, place in a colander and rinse under cold water to remove the excess salt and set aside.
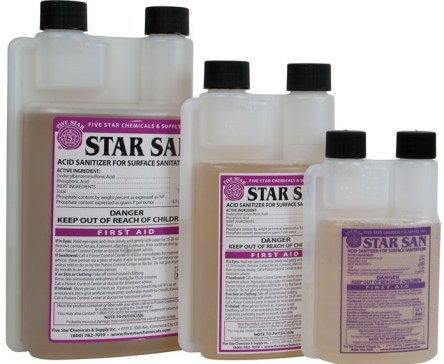
Rinse and clean your fermentation vessel and prepare to sanitize it. If you are using a pot you can sanitize it simply by filling it with water and boiling it for at least 2 minutes, but I would recommend picking up a no-rinse sanitizer like Star San which you can order online or find at a home brewing store for beer and wine. Follow the directions on the bottle to sanitize your fermenting vessel.
Sanitizing is important to prevent the growth of unwanted bacteria that will cause your kimchi to mold and ruin your entire batch.
Now that you vessel is sanitized it’s time to add everything together; either wear some gloves or prepare to get your hands dirty. Mix all the ingredients in the vessel making sure everything is evenly coated with spice and liquid. This is undoubtedly one of my favorite parts, smelling the rich aromas of all the ingredients combining together. It makes me salivate just thinking about it.

Now for the fermentation, you will want the vegetables submerged under liquid. You can do this with food safe weights but there are other easy alternatives if you don’t have these on hand. For this method, I will be using a plate that happens to fit quite perfectly into this pot. Of course we will sanitize it before placing it inside. 
Another easy method would be to first trace the circumference of your vessel onto a piece of cardboard and cut it out a bit smaller so it will fit inside. Then place the cardboard cut out in a large Ziplock freezer bag (note: it does not have to be Ziplock brand and I am not sponsored by Ziplock but I am open to the idea). You can then use your makeshift weight to press the vegetables in the water. Some people advise against using plastic in fermentation, but because it will only be stored in the vessel for up to a week it will be fine. If you decide to get more into fermentation I suggest you invest in better tools but this method works perfectly and you will see that in the results.
Now to weigh it down into the liquid: for my DIY method, I will be using two (sanitized) pint sized or 440 mL jars filled with water.
Now all you have to do is cover the vessel with plastic wrap and store at room temperature in a cool dark place. I usually let it go for a week. It is up to you in the end, however I recommend a minimum of 3 days. After 3 days, open it up and give it a taste. The longer you let it go the stronger the taste and smell, but it also depends on the temperature. If it is being stored at a warmer temperature like in the summer time, it will speed up the fermentation process. I would only leave it out for 4 to 5 days maximum, although at any temperature you shouldn’t let it sit for much longer than a week or you will risk it completely rotting.
When it is finally ready, transfer it to some glass jars. This recipe will yield approximately 3 quart or 950 ml jars. Remember to give at least an inch of space between the top of the vegetables and the lid for the formation of gasses.
Now keep the jars in the fridge and enjoy whenever you want. Remember to burp the jars to release gasses periodically because the kimchi will still continue to ferment even at much cooler temperatures. As it stays in the fridge the taste will continue to develop and get stronger over time, which you can continue for up to a year. Although if you are like Kristina or I, a batch this sized probably won’t last more than a couple months.
I hope you enjoy making kimchi at home as much as I do and that it sparks an interest in doing more home fermentations. Until the next one, remember to keep it simple but full of love.
Recipe Card Below

